Cake Pops – The Basics

March 16, 2012

Cake Pops!!

What are they, you ask? They are only the most delectable and cutest cake treats in bite-size form!! These adorable desserts are becoming the talk of the baking town but not all of us are sure of how to make them.  Have no fear, after you are done reading this, you too, can make creative and delicious cake pops!  I am going to give you the steps you need to make a basic cake pop.  Once you have the basics down, you can try many different shapes and designs and techniques.  Lets get started:

What you will need:

1 Box of Cake Mix (your choice)

1 Can of Frosting (your choice)

1lbs Wilton Candy Melts (any color/flavor you desire)

*I used two bags of Wilton Yellow Candy Melts for this demo*

Wax Paper

Cookie Sheet

1 Package of Lollipop Sticks

Decorations of your choice

Optional: (but helpful) Cookie scoop

Steps:

1. Bake cake according to directions in a 9×13″ baking pan.  After cooked, let cool completely.

2. Crumble cake (using your hands) into a large bowl.

3. Add a can of frosting to the crumbled mixture using the back of a large spoon to mix the icing into the cake mix. Add a few tablespoons at a time as to not over saturate the cake.  The consistency when the cake is ready should be similar to that of a ground beef mixture when making meatballs.

4. Once you are happy with the consistency, you can then use a spoon or a cookie scoop to measure out equal amounts of cake and roll using your hands, to make balls.

5. Place your rolled cake balls onto a wax covered cookie sheet and place in the fridge or a cool place for 10-15 minutes.
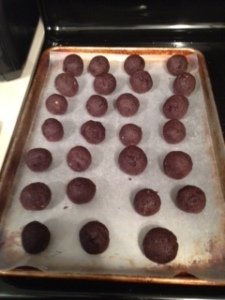
6. Once chilled, you can prepare your candy melts by microwaving in a microwave safe bowl. Make sure your bowl is not too deep as it will make it more difficult to keep your pops on their sticks.

7. Once your chocolate is melted, take your cake pops out of the fridge, and dip the end of each lollipop stick into the melted chocolate.  This will ensure the stick and cake ball stay together when rolling in the chocolate.

8. Once all your lollipop sticks have been put in all the cake pops, you must chill them for 5-10 more minutes. (Make sure to not let the cake pops get TOO cold. If they are too cold, they will crack the layer of chocolate once rolled.

9. After chilling for a few minutes, you may now dip your cake balls in your chocolate melts.  Use a spoon if you need to cover the top of the pop.  Once you have taken the pop out of the chocolate, tap the end of the lollipop stick gently to shake off any excess chocolate on the pop.

10.  If you prefer to have the cake pop fully round, you can insert the lollipop stick into a block of Styrofoam to hold it upright while it dries. For this demonstration, I have placed the cake pops directly upside down onto the wax paper.

11. Once your cake balls are all covered in chocolate, you can cool them for another 5-10 minutes.  Once they are cool, you are free to decorate them however you please! I choose to make little yellow baby chicks since Easter is on its way and so is SPRING!! I used the leftover melted chocolate to adhere the decorations to the pops.

For the cute baby chicks, I used Wilton’s Edible Candy Eyeballs for the eyes, mini gingerbread men sprinkles for the feet and 1/2 of a orange chocolate sunflower seed for the nose. The arms are made out of mini edible yellow chocolate sprinkles I had found in my pantry – but there are lots of different decorations you can use that look just as great.

I hope this helps many of you who have always wanted to make Cake Pops but didn’t know how. There are a few steps involved but the first bite makes every step worth it!!

HAPPY EASTER EVERYONE

&

HAPPY CAKE-POPPING!!

Gingerbread Decorating Fun!

December 11, 2010

Cookie Decorating Drop-In:  exchange confidences; firm up friendships

Last night I learned that you are never too old for gingerbread. That spicy, sweet confection, in the form of cookies, houses and imaginary concoctions, evokes memories of Christmas to me as sure as a child’s -endearing, tinsel-trimmed, pre-school  ornament  dangling on a Charlie Brown tree … or the innocence of a six-year-old singing her heart out at her first school concert. Little did I know, though, that the magic of gingerbread goes beyond childhood’s visions of sugar plums.

Wanting to party and re-connect with my women friends, I hosted gingerbread cookie decorating at my house and was truly amazed at how much fun it was for all who attended. I had the joy of baking a batch of edible goodie-gifts (see below for the easy Wilton fail-safe recipe which can be pre-made in do-able stages) and hosting my fun-minded, female friends with some favorite appies and beverages.

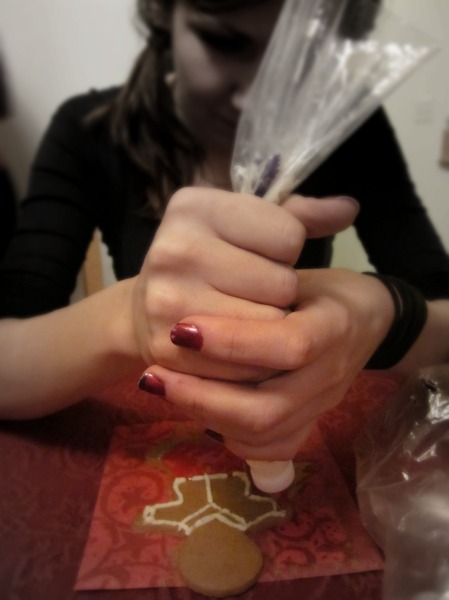
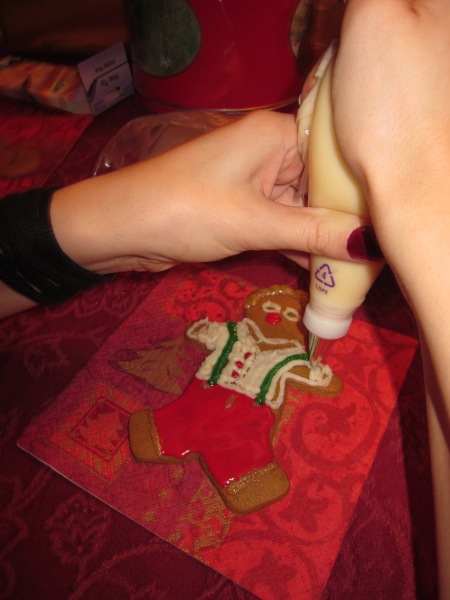
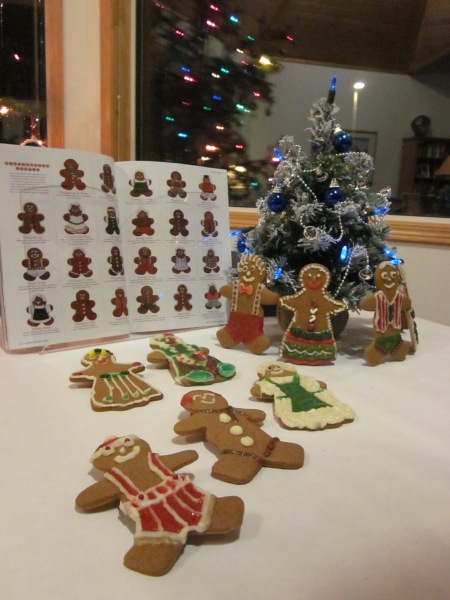
For the women who came, packaged sprinkles , glitzy icing gels in shiny red and green , white butter-cream in a disposable icing bag with a #3 outlining tip, and a double page spread in Wilton’s “Cookie Exchange” book were more than enough inspiration. The spectacular results (see photos) and the fact that guests were reluctant to give up their spots at the decorating table, speak to its success.

And this is what I most enjoy about my women friends: they so appreciate the gift of your time. Who knew that cookie decorating could be so bonding? It’s like going to the beauty salon was for women in the 1950s, or what a spa visit is for busy moms and new young career women today: sitting around the cookie table and working en groupe to personalize your own gingerbread boy or girl brings out hidden talent and promotes sharing and confidences. When you’re concentrating on something entirely removed from the everyday whirl of our busy lives to be creative, conversation and sharing flows easily across the generations. It made me realize how important time with girlfriends is to me. The bonus was getting my Christmas décor unboxed and up early, so I can enjoy it longer and really engage with family and friends.  Forget your perfect housekeeping, go for cookie decorating zen with your friends at home!

gingerbread decorating fun

Gingerbread Decorating fun

Gingerbread Decorating Fun Kitchen Boutique


Grandma’s Gingerbread Recipe from Wilton

5 cups all-purpose flour 1 tsp. baking soda 1 tsp. salt 2 tsp. ginger 2 tsp. cinnamon 1 tsp. nutmeg 1 tsp. cloves 1 cup solid white shortening 1 cup sugar 1 ¼ cups unsulphured molasses 2 eggs, beaten


1. Thoroughly blend flour, soda, salt and spices. Melt shortening in large saucepan. Add sugar, molasses and eggs to melted, but not bubbling-hot, shortening. Mix well. Cool, then add four (4) cups of the blended dry ingredients and mix well. Preheat oven to 350 F.

2. Turn mixture onto lightly floured surface. Knead in remaining dry ingredients by hand. Add a little more flour, if necessary, to make a firm dough. Divide dough in half and form into two discs. Wrap well in plastic wrap and refrigerate to keep for weeks. Bring to room temperature and knead briefly to resume baking at a later time or day.

3. Roll out dough on the backs of lightly oiled cookie sheets to 1/8 inch thickness. Position and cut out shapes so that they are at least one inch apart. Remove excess dough, re-form into ball and re-roll surrounding dough on back of another cookie sheet. Cut shapes again and repeat process until all dough has been used. For large pieces, 1/8 inch thick, bake as long as 14 minutes; for smaller pieces, rolled thinly, six or seven minutes may be enough. Check frequently to avoid over-browning. Using flat spatula, remove from cookie sheets to wire racks and cool for 30 minutes. Then cover a flat surface with paper toweling and place baked pieces on it to dry overnight. Yield: about 40-45 regular size (six inch) gingerbread boys or girls.


Cochrane Gingerbread House Competition

November 25, 2010

Cat In The Hat Gingerbread House

Our Gingerbread House Competition that took place last Saturday was fantastic!  I could not believe the quality and the detail that so many of our competitors put into their houses!  Well done everyone!!! We had 13 entries and we gave out prizes for the first($500 Gift Certificate), second ($250 Gift Certificate) and the third ($100 Gift Certificate) place winners…

First Place Winner: Carey Thomson – “Cat in the Gingerbread Hat”

Second Place Winner: Amy Gaudet – “Mansion with the Green Roof”

Third Place Winner: Paige Korstrom – “Chateau de Paige”

Congratulations! CBreeze

GingerBread Contest Cochrane

Gingerbread Contest Cochrane


Wildly Delicious Brie Baker

October 14, 2010

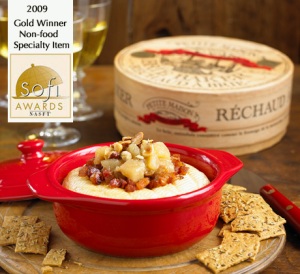
Wildly Delicious Brie Baker We recently got in boxes and boxes  of Brie Bakers… and I have to tell you… these are the hottest gift!

Place brie wheel inside the baker… put into oven at 350 degrees for 15-20 minutes and voila! Baked Brie.

Add chutney or, as I did over Thanksgiving… add Brie Brulee topping and ohmygoodness! Yummy!

The Brie Brulee topping we tried out was the Honey Orange… you sprinkle it on top the brie, before you put it in the oven and it carmalizes while the brie is cooking… when the brie is finished… you can nip it under the grill for a few minutes or use a torch and just “finish-off” the carmalizing brie brulee.

I couldn’t believe how delicious this tasted… I’m never going to get into my skinny pants now!

Available in red, cream, cassis (eggplant), rosemary (green).

Available in two sizes: Single Brie Wheel $19 or Party Wheel $30

Cbreeze


Canada Day Cupcakes and Cookies

June 28, 2010

As Canada Day approaches and festivities get into full swing, thoughts everywhere will be turning to food for the Big Day. Whether you are planning a big family get-together at home, a BBQ on the deck, a picnic in the park or a day at the beach, why not tempt those sweet taste buds with these quick and easy Canada Day cupcakes and cookies.

If you can bake your own cupcakes and cookies that’s always good but if time is an issue, then buy them and forgo the guilt…no-one will mind.

For the Cookies – Smooth creamy white buttercream icing on to the top of your cupcakes.
With a maple leaf cookie cutter, make an indentation on the top of the buttercreamed cupcakes.
Fill an icing bag with red medium buttercream icing and, with a star tip number 16 fill in the maple leaf shape with tiny red stars.
If your cupcakes are big enough, pipe a pretty star border around the edge, with the same tip.

For the Cookies – Fill 2 icing bags, one with white medium icing and one with red.
Place a maple leaf cookie cutter on your cookies and pipe and outline with a number 2 tip. Then change the tip to number 16 and fill in with stars, just like the cupcakes.
Red maple leaves look great on light and oaty cookies but chocolate based cookies make perfect bases for white maple leaves.

Have a great Canada Day
Happy Baking
Jane


Comfort Cooking

June 3, 2010

Icing Cake

What do you do if your car breaks down and is going to cost a small fortune to fix, or you miss out on the job you set your heart on to someone you know will be rubbish at it, or, like me, you walk into the hairdressers on a sunny morning hoping to emerge as a Catherine Zeta Jones lookalike, and not only do you not, but the cut you asked for is nothing like the one you actually ended up with, and cut very badly at that?!

Well, if you are like me you go home, way past disappointed, pop the cork on a bottle of wine, pour yourself a glass and rip the wrapper off the biggest chocolate bar in the cupboard so you can wallow for a while in dark self-pity until the wine begins to take effect and you notice the sun is still actually shining.

My next step was to spend the rest of the day in my kitchen baking up a storm until I reached my comfort zone again. It is almost therapeutic, like a healing process and one I would heartily recommend if you love cooking and are having a bad day.

So I spent my afternoon measuring, beating, whisking and smoothing until the air smelt of sweet satisfaction and sponge cake. Once it was cooled I mixed up some creamy buttercream and spread it on one half of my cake then covered the other half with my favourite strawberry jam. After sandwiching them together I slid my cake on to the prettiest plate I had and dusted it with icing sugar. Wow – what a cake!

So next time you are having a bad day, especially a bad hair day, get yourself into the kitchen for a few self-healing hours……and perhaps, buy yourself a hat!!
Until next time
Happy Baking
Jane